I am adding this to:
Crafting With Dragonflies - #59 Cards with dragonflies or butterflies as the main focus
A Bit More Time To Craft - #21 Anything Goes
Stamping Sensations - June Feature a Creature
Craft Your Passion Challenges - #315 Always Anything Goes
Fab N Funky Challenges - #308 Favourite Colour Combo
Eureka Stamps - #196 Things With Wings
Stampin' Up! Materials:
Stamp sets - Watercolor Wings, Endless Thanks
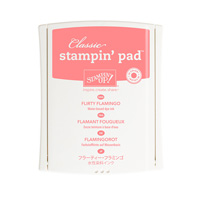
Ink pads - Flirty Flamingo, Peekaboo Peach, Soft Suede
Card - Watercolor paper, Flirty Flamingo, Whisper White thick card
Other - spritzer, clear blocks, Big Shot
Other non SU - mouse mat, kitchen towel
 Cut Whisper White thick card to 14.5cm x 21cm, and score to create a card blank
 14.5cm x 10.5cm (UK A6)
Cut Flirty Flamingo card to 14cm x 10cm
Cut the watercolor card to 13.5cm x 9.5cm
Mount the butterfly stamps onto blocks ready to stamp.
 Place the watercolor card onto an upside down mousemat (or another surface with
a bit of give) - I find that photopolymer images stamp better with a cushioned surface
under the card I am stamping onto.
Spritz the card with clean water, let it soak in a little - spritz again if it looks as if the water has completely soaked in.
 Ink up the outer butterfly image in Peekaboo Peach and stamp while the card is still wet - spritz further If the ink does not bleed as much as you would like it to. Repeat until you have filled the card with the butterflies.
Spritz the card again, ink up the inner butterfly image in Flirty Flamingo and stamp while the card is still wet - again spritz further if the ink does not bleed as much as you would like it to. Repeat until you have added all three inner butterfly Images. Now let the card dry.
 Now its time to add the full depth images on top of the “Watercoloury” images. Ink up each butterfly layer and stamp over the blurry images.
 Add a sentiment of your choice, layer onto the card blank, and you have your finished card. If you find the watercolor card is a bit warped run it through the Big Shot before adding it to the card base.
The watercolour bleed and depth of colour will depend on how much water you spritz onto the card, the colour of ink, how juicy the ink pad is - so my suggestion is have a play, try out different colour combinations and the amount of water used and see what you prefer!
I had a bit of fun and tried out lots of different colour combinations. I hope you
have fun experimenting too!


Thank you for sharing your lovely creation at the weekly Eureka Stamps challenge - things with wings. I am off to church now, but will certainly come back to read your instructions. This is a great look. Dorothy S, Eureka Stamps DT member
ReplyDeleteStunning cards, Mandy, I love them all! And thanks for the step-by-step. It's an interesting technique that I will certainly try. Thanks for joining us at Stamping Sensations for our Feature A Creature challenge.
ReplyDeleteLynne
I love the look you have created, beautiful cards. Thanks for joining us this week at Eureka Stamps for our things with wings challenge. Karal DT
ReplyDeleteSuper Butterfly creations and looks like you had a real fun inky time Mandy, many thanks for joining us at Stamping Sensations Challenge.
ReplyDeleteB x
Lovely work. Thank you for joining the challenge at Crafting with Dragonflies and at A Bit More Time to Craft. Hope to see you again next time
ReplyDeleteWhat a striking card and clever ink technique! Thanks so much for joining in the fun with our 'Favourite Colour Combo' challenge at Fab 'n' Funky this week. Love your colour choices! Hugs, Wends x Fab 'n' Funky DT
ReplyDeleteThank you Mandy, I have CASEd these cards for a display recently. They looked amazing, thank you again :)
ReplyDeletevery nice cards :) Jarka
ReplyDeleteSuper bit of inky work, loving the gorgeous colours Mandy! Thanks for joining us at stamping Sensations.
ReplyDeletePinky
Amazing work - thanks for the tutorial. Thanks also for sharing with us at Crafting with Dragonflies.
ReplyDeleteBeautiful - a really elegant design and thanks for the 'how to' as well.
ReplyDeleteThanks for joining us at Crafting With Dragonflies.
Helen x